
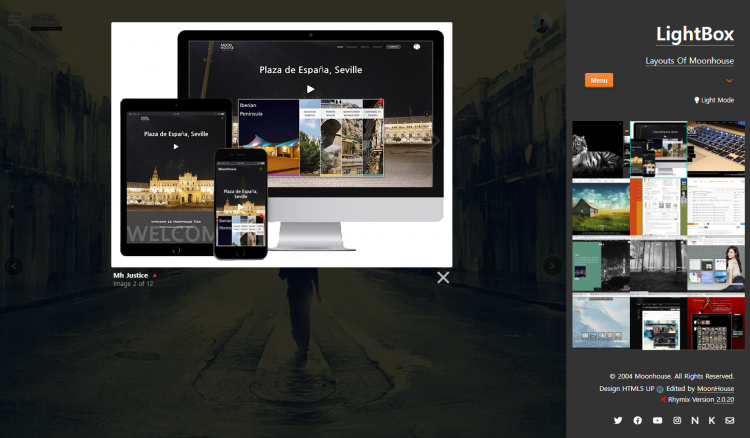
이미지를 팝업으로 화면에 띄우는 대표적인 플러그인이 LightBox 입니다.
데모 : https://moonhouse.co.kr/lb
원소스 : https://lokeshdhakar.com/projects/lightbox2
지금껏 주로 사용을 해 오다.
Mh Gallery 프로그램을 만들다 좀더 나은 것을 찾다가 발견한 플러그인이 Colorbox 입니다.
데모 : https://moonhouse.co.kr/cb
원소스 : http://www.jacklmoore.com/colorbox
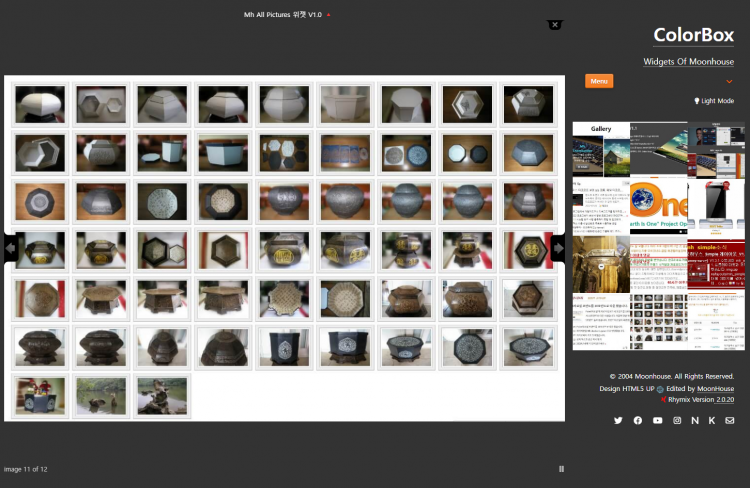
두 플러그인을 간략하게 비교를 하자면 LightBox는 기본에 충실하고,
Colorbox는 세부적인 옵션들이 굉장히 많습니다.
1. Colorbox의 세부옵션 소개
•slideshowAuto를 지원
- Auto에 따르는 부수적인 기능들 -- 속도, 수동 / 자동, 버턴
•transition 지원
- fade, elastic, none 지원
•첫화면 출력지원
- LightBox의 경우는 썸네일을 클릭시 화면이 출력되는 반면
Colorbox의 경우는 첫화면을 자동으로 띄울 수 있습니다.
•팝업의 위치를 조절 가능 - top, bottom, left, right, 기본은 가로 세로 중앙위치
- LightBox의 경우는 가로는 중앙이나 세로는 상단에 위치합니다.
•그 외에도 많은 옵션들을 가지고 있습니다.
2. Colorbox 설치방법 (Rhymix를 기준으로)
•원본소스 를 다운 받습니다.
•소스중 colorbox.css & jquery.colorbox.js 그리고 해당 이미지들을 지정 폴더에 업로드 합니다.
•적용할 html 위에 코드 적용
<load target="css/colorbox.css" />
<load target="js/jquery.colorbox.js"/>
•script를 작성합니다.
<script>
    $(document).ready(function(){
        $(".cb").colorbox({rel:'cb',
        transition: "fade",
        speed: 500,
        fadeOut: 1000,
        opacity: 0.9,
        <!--@if(!Mobile::isMobileCheckByAgent())-->
            open: true,
            height: "95%",
            width: "73vw",
        <!--@else-->
            open: false,
            height: "95%",
            maxWidth: "100%",
        <!--@end-->
        slideshow: true,
        slideshowAuto: true,
        slideshowSpeed: 5000,
        });
    });
</script>
•적용할 html(위젯)
<a class="cb" href="원본이미지" title="제목">
   <img src="썸네일이미지" alt="" />
</a>
class="cb" 를 위의 script에 $(".cb").colorbox({rel:'cb', 에 class적용합니다.
•원본소스는 vh, vw가 적용 이 되지를 않는데 적용되게끔 수정
jquery.colorbox.js 245줄
[수정전]
function setSize(size, dimension) {
        return Math.round((/%/.test(size) ? ((dimension === 'x' ? $window.width() : winheight()) / 100) : 1) * parseInt(size, 10));
    }
[수정후]
function setSize(size, dimension) {
        return Math.round((/%/.test(size) ? ((dimension === 'x' ? $window.width() : winheight()) / 100) : 1) * parseInt(size, 10)) *
            Math.round((/vw/.test(size) ? (document.documentElement.clientWidth / 100) : 1)) *
            Math.round((/vh/.test(size) ? (document.documentElement.clienHeight / 100) : 1));
    }
•jquery.colorbox.js 를 열어보면 옵션들이 보입니다.
// behavior and appearance
transition: "elastic",
speed: 500,
fadeOut: 500,
width: false,
initialWidth: "1000",
innerWidth: false,
maxWidth: false,
height: false,
initialHeight: "800",
innerHeight: false,
maxHeight: false,
scalePhotos: true,
scrolling: true,
opacity: 0.9,
preloading: true,
className: false,
overlayClose: true,
escKey: true,
arrowKey: true,
top: false,
bottom: false,
left: false,
right: false,
fixed: false,
data: undefined,
closeButton: true,
fastIframe: true,
open: true,
reposition: true,
loop: true,
slideshow: false,
slideshowAuto: true,
slideshowSpeed: 5000,
slideshowStart: "start slideshow",
slideshowStop: "stop slideshow",
photoRegex: /\.(gif|png|jp(e|g|eg)|bmp|ico|webp|jxr|svg)((#|\?).*)?$/i,
위의 옵션들중에 js에서 수정시 작동을 안하는 경우가 있습니다.
html의 script에 적용을 해야 합니다.
height, width와 관련된 옵션들에는 " "사이에 px, %, 500, vh, vw를 사용할 수 있습니다.
•colorbox.css 설명
#cboxOverlay { background-color:#333; opacity:0.9; filter:alpha(opacity = 90); }
#cboxContent { margin-top:20px; background:#fff; }
#cboxLoadedContent { border:5px solid #fff; background:#000; }
- 배경색상, 컨탠트색상, 보드라인 색상을 결정하는 코드
#cboxTitle { ... } /* 게시글제목 */
#cboxCurrent { ... } /* 이미지 넘버 */
#cboxSlideshow { ... } /* 슬라이드 시작/멈춤 텍스트*/
- 참고로 아래 코드에서 팝업의 상하좌우 여백을 조절 할 수 있습니다.
#colorbox { outline:0; margin-left:-11em; }
 Colorbox 사용법 2탄
 다크모드를 구현해 보면서...
 Tip이 도움이 되었다면 댓글과 평가 부탁합니다.
Tip에 대한 궁금한 점은 댓글로 남겨 주시면 성심껏 답변 드립니다.
Tip이 도움이 되었다면 댓글과 평가 부탁합니다.
Tip에 대한 궁금한 점은 댓글로 남겨 주시면 성심껏 답변 드립니다. 


